Step 7: Monitoring Progress
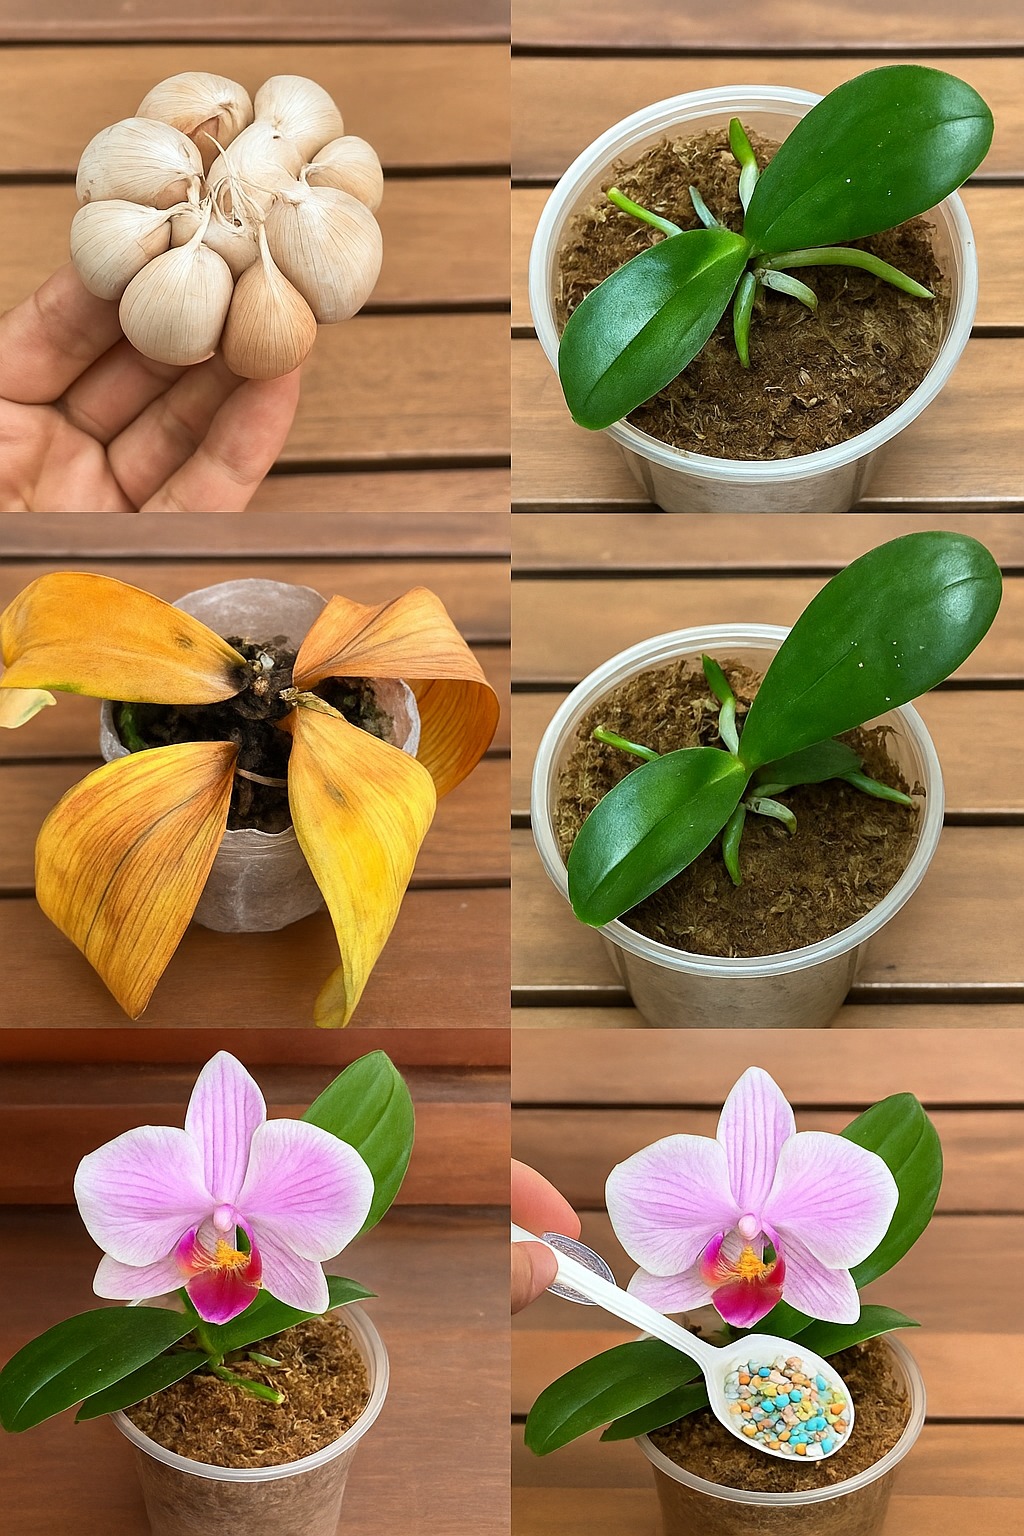
After 25 days, you should start noticing new root growth. The small plant will begin to revive, and the roots will appear stronger and healthier. Continue misting the plant lightly to maintain adequate moisture.
After two months, your orchid should be well on its way to full recovery. The leaves will regain their healthy green color, and the roots will be established. At this stage, the covering can be removed, allowing the plant to gradually adapt to its natural environment.
Step 8: Transplanting into a Permanent Pot
Once the roots have grown sufficiently, transplant the orchid into a larger pot with a more stable growing medium, such as pine bark. Adding a layer of moss on top can further help retain moisture and promote healthy growth. Water the plant just enough to keep the medium slightly moist but not soggy.
Final Thoughts
Recovering an orchid with leaf rot may seem challenging, but with this simple method, you can revive even the most damaged plants. By using natural garlic water, disinfecting the roots and growing medium, and maintaining the right humidity, your orchid can grow strong and healthy.
I hope this method helps you successfully restore your orchids. With patience and proper care, your plants will continue to thrive and bloom beautifully. Happy gardening!